

The very properties that make compressed media useful in almost every area of modern life can also make it dangerous when mishandled. Dixon® quick disconnect couplings have been carefully engineered to meet specific industry requirements while maintaining appropriate safety margins. If quick disconnect couplings are not used in the correct applications or are incorrectly applied, accidents and downtime can result. It is up to the distributor to supply the right coupling for the application.
S.T.A.M.P.E.D. Questions and Selection Process
The use of S.T.A.M.P.E.D. will help in the proper selection of quick disconnect coupling products. When in doubt, Dixon will provide information, including test results (if available), coupling recommendations, and other data to help resolve quick disconnect coupling-related issues.
Size: Couplings should be selected to handle the flow and pressure requirements of the system. Excessive pressure drop will result in restricted flow, slower actuation, higher fluid velocity, heat generation, and eventually a breakdown of fluids, seals, and components.
- What size coupler is required?
- What is the maximum allowable pressure drop for the application?
- Are there any size restrictions due to a ‘tight-spot’ installation?
Temperature: Media and ambient temperatures must be limited to the specific operating parameters of the selected sealing materials. Excessive cold will reduce sealing capability, while excessive heat can cause the premature breakdown of body and valve seals.
- What is the media/fluid temperature?
- What is the ambient temperature?
- Are there any 'flash' heat or fire sources near the connection?
Application: Quick coupling interchangeability needs to be closely reviewed. There are several instances where non-interchangeable couplers and plugs may connect. This is very dangerous and these couplings should never be pressurized. Be sure to match like series couplers and plugs.
- Is an industry interchange coupler required?
- What are the functional requirements of the coupling?
- Have there been any problems with other couplings in this application?
Media: Quick disconnect couplings are available with a variety of body materials and seal options. Exposure to harsh and corrosive operating environments may reduce service life. Several quick couplings release fluid upon disconnection, which may be a safety concern.
- Which seal and body materials are compatible with the system fluid?
- Is air inclusion, system contamination, or fluid loss a concern?
- Is the fluid dangerous to the operator?
Pressure: During the selection process, the published working pressure of the coupling must be equal to or greater than the maximum system pressure. Surge pressures in a fluid power system, higher than the rate pressure, will shorten the service life of the coupling.
- Is the pressure 'static' or 'dynamic'?
- What is the maximum operating pressure required for the application?
- Are there any pressure spikes in the system?
Ends: Many end configurations are available and each one has specific operating parameters. For example, the working pressure of couplings utilizing hose barb or collar hose barb end connections may be dramatically reduced. If in doubt, test under controlled conditions for suitability to the application.
- What end configuration and size is required? (male threaded, female threaded, or hose barb)
- Does the chosen end configuration support the application parameters and system pressure?
- What is the ideal valving configuration? (single shut-off, double shut-off, or unvalved)
Dixon: Dixon recommends that, based on the hose, fittings, and attachment method used, all assemblies be permanently marked with the designed working pressure and intended media. Do not use other manufacturers' fittings or ferrules with Dixon products due to the differences in dimensions and tolerances. We also recommend that all hose assemblies be tested frequently.
Safe Quick Coupling Practices
Quick disconnect couplings can fail without warning. Prior to the operation of quick coupling products, be sure to inspect and replace worn-out fittings and safety devices. If a leak is detected during operation, release the pressure from the circuit before investigating the cause of the fluid leak. Do not use your fingers or skin to check for leaks. High-pressure leaks of fluids can easily penetrate the skin and cause serious injury or death. Always keep these 10 safe quick coupling practices in mind:
- Always wipe the coupling cavities and faces clean before connecting a coupling
- Connect coupling before installation to ensure that it works properly
- Always check the body seals before connecting a coupling
- Shut off the power source before connecting a coupling
- Always install a safety check valve on a pneumatic line and/or compressor
- Always use a safety cable on large air lines (1/2" lines and larger)
- Always use a whip hose on hydraulic or air tools
- Use dust caps or plugs when couplings are not in use
- If the locking sleeve is inoperable, check the safety lock
- Wear eye protection while connecting or disconnecting a coupling
Unsafe Coupling Practices
Knowing what is not safe and how to circumvent making mistakes is imperative for any operation. Here are 10 unsafe coupling practices to avoid:
- Never hit coupling valves to release trapped pressure
- Never leave couplings in the path of moving equipment
- Never use couplings near a welder, flash heat, or fire/flame sources
- Never use API-modified sealants or over-apply PTFE tape during installation
- Use care if you must install quick couplings onto black iron pipe
- Never hit a coupling sleeve with a hammer or blunt object
- Never over-tighten a coupling connection
- Never rotate a quick disconnect coupling under pressure
- Do not over-pressurize quick disconnect couplings
- Never use a hose with a quick disconnect coupling to lift a tool
Watch this video to learn more about the five most common misapplications for quick disconnect fittings.
Be Safe When Installing Quick Couplings
Couplings should be installed in a location that will allow easy operation of the coupling and accessibility for all necessary installation tools. Care should be given to consider operator safety, especially if spillage upon disconnection could result in fluid ignition or skin and eye irritation.
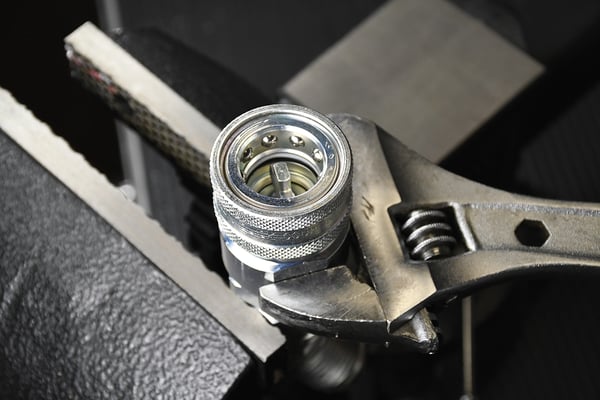
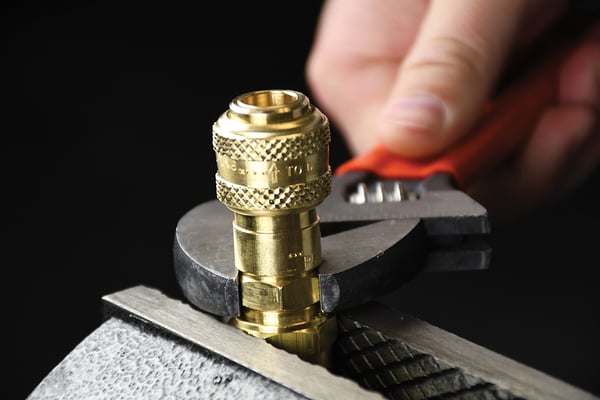
Only apply wrenches to the hex or machined wrench flats provided for assembly purposes, nowhere else. Never clamp on the sleeve of the coupler or the nose of the plug as this will cause distortion and/or damage.
Finally, always test quick coupling installations before putting them into operation by pressurizing the unit to 150% of the working pressure in an enclosed/protected environment.
Installation of Tapered Thread Connections
The step-by-step process to install tapered thread connections is described in Dixon's Proper NPT Threads Installation blog post. Check it out!
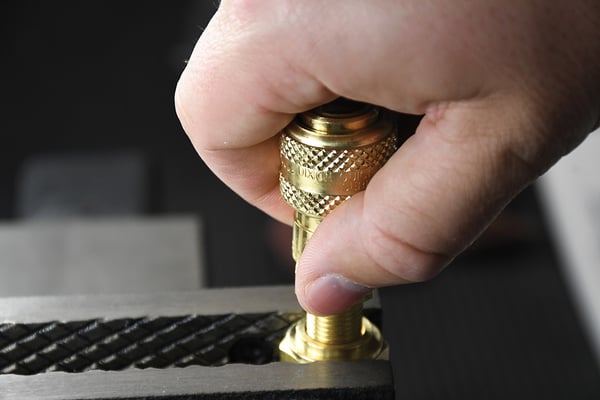
Installation of O-ring Boss® (ORB) Connections
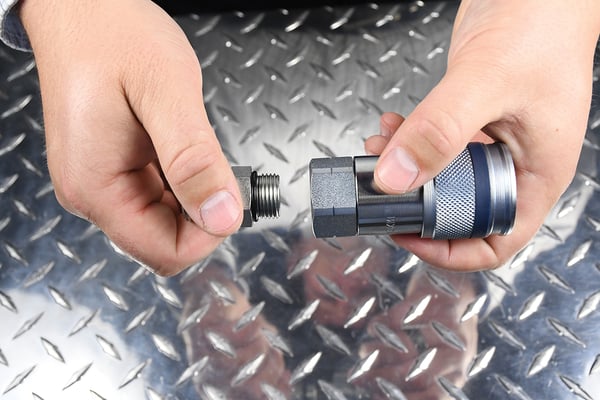
To install O-ring Boss connections, lightly lubricate the O-ring on the adapter and thread it into the coupling. Hand-tighten, ensuring the O-ring is not pinched during installation.
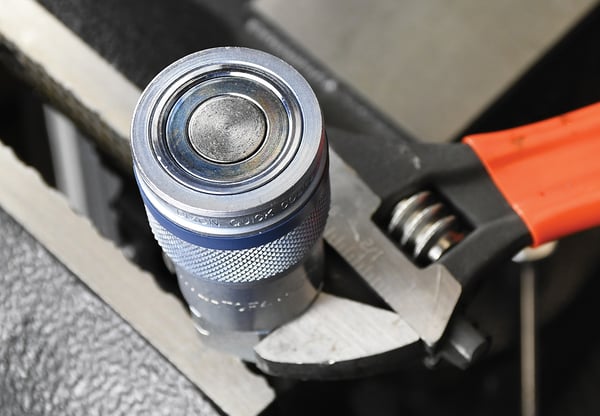
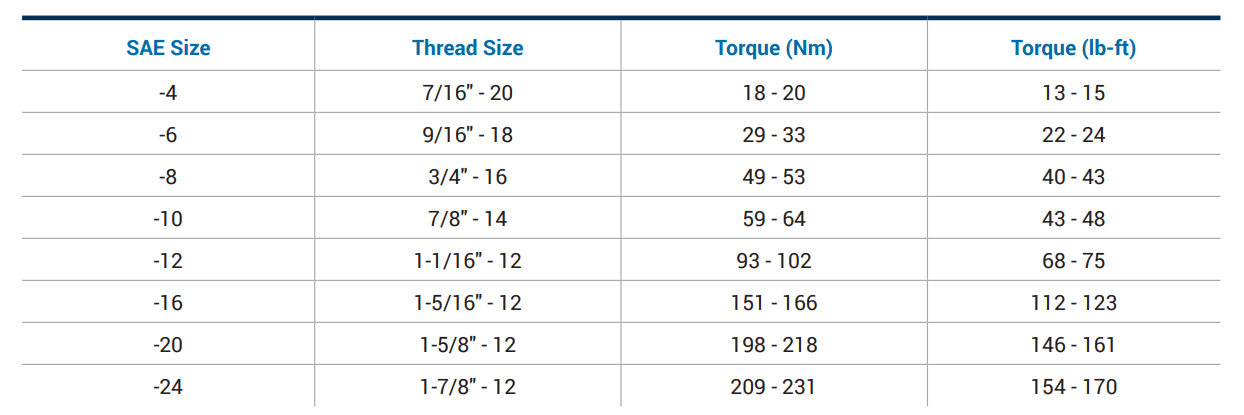
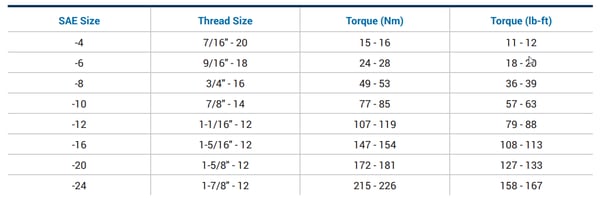
Use a wrench to tighten the connection to the appropriate torque specification as shown in the chart below.
Watch this video for a demonstration of how to install ORB connections.
Installation of 37° Flare (JIC) Connections

The first step to installing 37° flare connections is to lightly lubricate the flare on the adapter and thread it into the coupling. Hand-tighten and ensure the flare is seated correctly during installation.
Finally, use a wrench to tighten the connection to the appropriate torque specification.
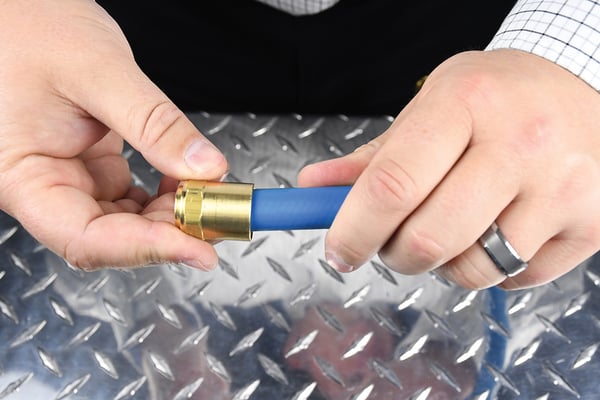
Installation of Reusable Hose Couplings
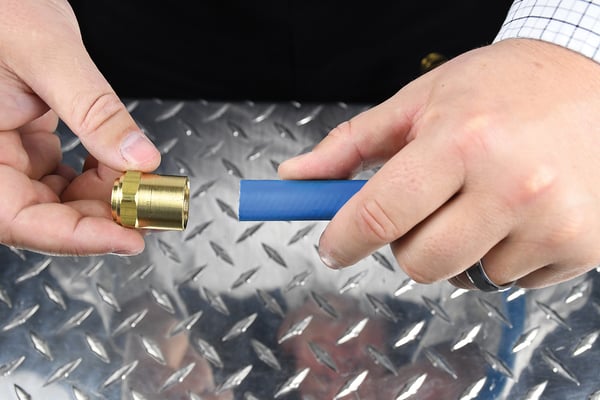
To install reusable hose couplings, start by trimming the end of the hose as squarely as possible.
Install the ferrule by slipping it onto the end of the hose and twisting it counterclockwise.
Then, apply lubricant sparingly to the reusable barb before inserting it into the ferrule.
Turn the reusable fitting into the ferrule until the coupling is seated against the ferrule.
Installation of Push-Loc Hose Connections
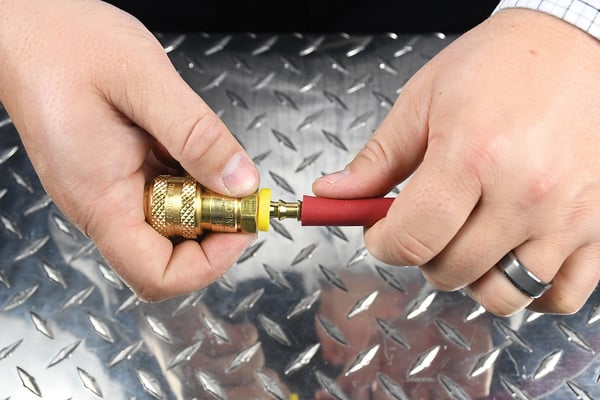
Push-Loc hose connections are installed by first trimming the hose end squarely. Then, lubricate the Push-Loc barb and hose. Insert the Push-Loc barb into the hose until the first barb is inside the hose.
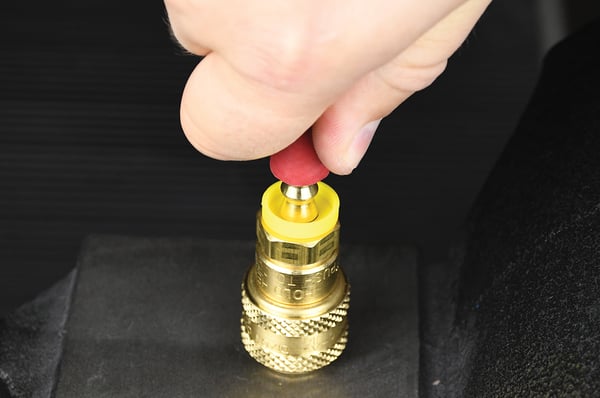
Place the end of the fitting against a flat object and grip the hose one inch from the end. With a steady force, push until the end of the hose is covered by the yellow plastic cap.
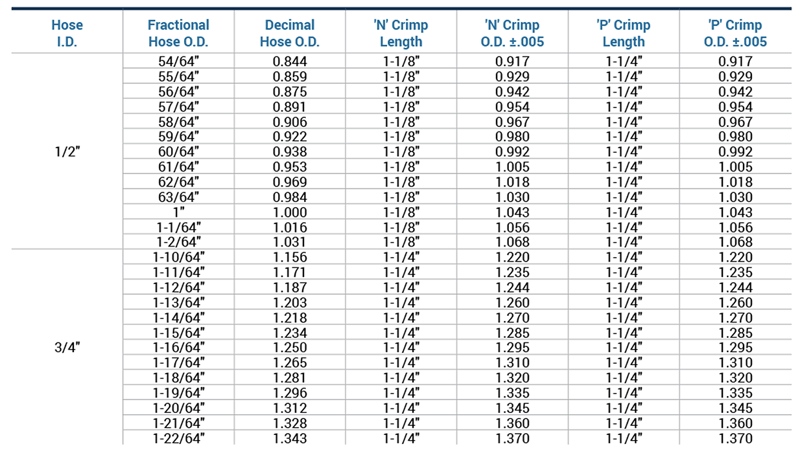
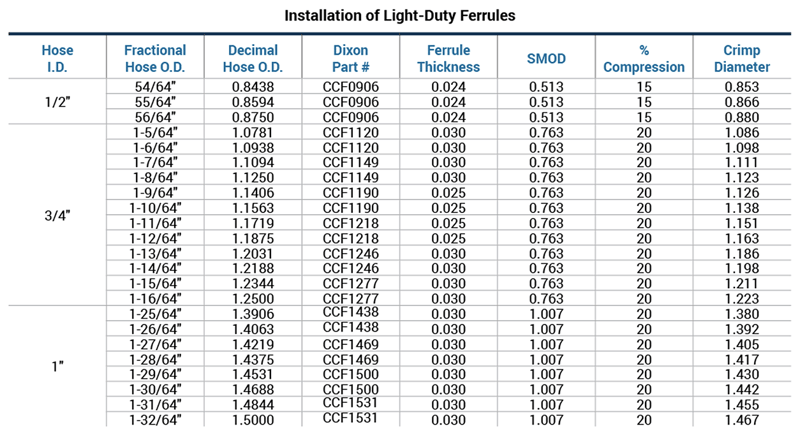
Installation of N and P-Series Ferruled Hose Barbs
The charts below should be used as a guide and not as a steadfast rule. In some instances, alternative dies and crimped dimensions must be employed. Hoses, as well as couplings, react differently during crimping due to the fact that there are variances in hose constructions for hose with similar dimensions. Some variables include textile braid versus wire braid, hardwall versus softwall, presence or lack of internal spiral wire, as well as differences in hose covers.
The outer diameter of the hose tends to fluctuate from end to end and production lot to production lot. We suggest you measure the hose O.D. and maintain accurate records for each coupling application.
Watch this video to see how Dixon's N-series couplers connect. We also demonstrate how to connect Dixon's P-series couplers here.
Summary
Whether it's for utility hoses in refineries, virtual pipelines, or another application, it is important to not only select the proper quick couplings for the job but also to install them safely. Dixon is committed to providing The Right Connection® to meet your needs. For more information about Dixon's quick couplings, visit dixonvalve.com or call 877.963.4966.